Today's postings
- [Baren 40736] Mounting Linoleum (Elizabeth Busey)
- [Baren 40737] Re: Mounting Linoleum (Daniel Dew)
- [Baren 40738] Re: Mounting Linoleum ("Clive.ca")
- [Baren 40739] Re: Mounting Linoleum (Diane Cutter)
- [Baren 40740] Re: Mounting Linoleum (Barbara Mason)
- [Baren 40741] Dave bull - studio (Marilynn Smith)
- [Baren 40742] new year's prints (Charles Morgan)
- [Baren 40743] Re: Mounting Linoleum (Elizabeth Busey)
- [Baren 40744] Baren Member blogs: Update Notification (Blog Manager)

Message 1
From: Elizabeth Busey
Date: Thu, 04 Mar 2010 13:46:22 GMT
Subject: [Baren 40736] Mounting Linoleum
Send Message: To this poster
I have a question for the linocut folks out there about mounting linoleum. I have been buying golden linoleum in rolls, then using household adhesive (like Liquid Nails but cleans up with water) to adhere the lino to some MDF. I run the whole thing through my press, and then weight it down for 24 hrs...
But I still get places where the lino doesn't print as well -- so they show up as lighter areas in the print.
Any suggestions or guidance?
Many thanks,
Elizabeth
Elizabeth Busey
www.elizabethbusey.com
Message 2
From: Daniel Dew
Date: Thu, 04 Mar 2010 13:51:00 GMT
Subject: [Baren 40737] Re: Mounting Linoleum
Send Message: To this poster
Never had an issue before.
Instead of liquid nails, try Gorilla glue, spread thinly over the
backing. It may just be that the liquid nail stuff is not pliable
enough for the burlap and is causing bumps.
Daniel Dew

Message 3
From: "Clive.ca"
Date: Thu, 04 Mar 2010 14:15:59 GMT
Subject: [Baren 40738] Re: Mounting Linoleum
Send Message: To this poster
issue I'd look at 1.) the glue, it may be forcing some areas higher,
2.) The board, it might not be perfectly smooth or may have been damp
& and has swollen in areas, 3.) your printing pressures i.e. not the
lino but a thickness issue with whatever was between your plate/paper
and the roller of your press (move your plate and see if the low area
remains in the same place) and 4.) the surface of the lino, it may
not be picking up ink evenly - a LIGHT sanding with a fine grit
sandpaper should alleviate that issue.
Great web site. I really liked your prints.
Clive
>
> I have a question for the linocut folks out there about mounting
> linoleum. I have been buying golden linoleum in rolls, then using
> household adhesive (like Liquid Nails but cleans up with water) to
> adhere the lino to some MDF. I run the whole thing through my
> press, and then weight it down for 24 hrs...
>
> But I still get places where the lino doesn't print as well -- so
> they show up as lighter areas in the print.
Message 4
From: Diane Cutter
Date: Thu, 04 Mar 2010 14:17:12 GMT
Subject: [Baren 40739] Re: Mounting Linoleum
Send Message: To this poster
I think the Liquid Nails might not be spreading enough?
Diane
www.DianeCutter.com
www.theitinerantartist.blogspot.com
www.DCutter.etsy.com
Message 5
From: Barbara Mason
Date: Thu, 04 Mar 2010 14:34:45 GMT
Subject: [Baren 40740] Re: Mounting Linoleum
Send Message: To this poster
I have always used elmers white glue... and only books. Never had a problem so think the glue is not evenly adhering the backing to the block.
My best
Barbara

Message 6
From: Marilynn Smith
Date: Thu, 04 Mar 2010 14:49:19 GMT
Subject: [Baren 40741] Dave bull - studio
Send Message: To this poster
fun. You look busy and it looks comfortable.
Marilynn

Message 7
From: Charles Morgan
Date: Fri, 05 Mar 2010 00:25:32 GMT
Subject: [Baren 40742] new year's prints
Send Message: To this poster
Cheers ...... Charles
Message 8
From: Elizabeth Busey
Date: Fri, 05 Mar 2010 01:12:51 GMT
Subject: [Baren 40743] Re: Mounting Linoleum
Send Message: To this poster
Elizabeth Busey
www.elizabethbusey.com
Digest Appendix
Postings made on [Baren] members' blogs
over the past 24 hours ...
Subject: Caleb and Joel
Posted by: Annie B
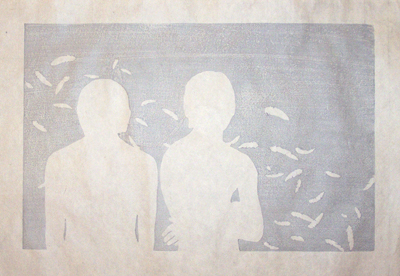 Their names were Caleb Cheeshahteaumuck and Joel Iacoombs, and they were the first two Native students to attend the Harvard Indian College, class of 1665. I'm totally making up what they looked like. When I first started making woodblock prints I would plan out all the colors and layers, carve all the blocks in succession, and then do all the printing at once according to the plan. Lots of times the prints came out pretty close to what I had planned, but I found that the printing phase felt sort of rigid and I would get all tense trying to make it come out the way I had planned. Over time I've developed a more leisurely approach where I carve a block or two, print a few passes, evaluate what I've got and then carve another block or two and print some more. This lets me respond to the various surprises and ideas that crop up as the print progresses. I still work with a plan, but I'm willing to change it as the print takes shape. In this case, though, I ran out of paper. I ordered some from McClain's and since I had to wait a few days for it to come I did the old method of carving all the blocks. This morning I printed the first one (above). It's funny, because already I'm thinking that one of the blocks I carved is unnecessary. We'll see what happens later, but if I don't use it I'll show it to you at the end. Copyright Woodblock Dreams blog
|
This item is taken from the blog Woodblock Dreams.
'Reply' to Baren about this item.
Subject: Run 3 (almost) finished
Posted by: conor
Just got back from being kicked out from the art studio. Security at the U of M ususally kicks you out around 2-3 am if you're an undergrad. Only problem - I only had 3 prints left to go (out of 25 or so), which would have taken 15 minutes if I had the time. I don't mind getting kicked out normally but considering I now have to set up /clean up space with multiple rollers and inks for just 3 more prints, it sucks. Oh well. This print is about as confusing as it gets, for me. I'm using a key black block and two blocks for color, each with their own areas, and using them mostly reductively. This is a view after my third run (Small reds, blue car windows, and hosta greens). This print is about as confusing as it gets, for me. I'm using a key black block and two blocks for color, each with their own areas, and using them mostly reductively. This is a view after my third run (Small reds, blue car windows, and hosta greens).Not a big difference compared to run 2, but it's starting to get there. Here's some after run #2   I'm using stencils for small color areas before I carve them away and get to the big stuff. I'm using stencils for small color areas before I carve them away and get to the big stuff.Here's a view of an inked block on the press ready for printing:  [Long item has been trimmed at this point. The full blog entry can be viewed here] |
This item is taken from the blog Woodcuts and stuff.
'Reply' to Baren about this item.