My Woodcut Process
(entry by Andrea Rich)
Editor's note: Andrea's process, the reduction method, is an extremely interesting way to make woodblock prints. In this page, she gives us an introduction to the technique in words. In preparation is an additional page that will include photographs and progressive proofs of the process.
I'd like to introduce myself to the woodcut artists and enthusiasts out there. My name is Andrea Rich, I live on the coast in California and have been producing woodcuts professionally since the mid 1980's. If you are interested in seeing some of my work you can view it on my web site. I use several techniques to produce my prints including multiple blocks, reduction method, and cutting the blocks apart like jigsaw puzzles but let me start at the beginning.
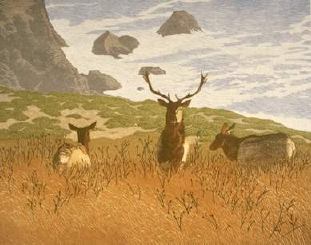
My particular interest aside from woodcut printing is wildlife. My work therefore begins in the field where I view, sketch, and photograph my subjects. Once inspired I head back to my studio and go to work composing a print. I do my original sketch on tracing vellum. This makes reversing the image easy later on. My sketch will not be a completed drawing but more like a cartoon or outline of the important elements of the composition. I rarely do a color sketch but have the colors in my head and make notations on the side of the sketch to indicate how many colors I will use. Most often I will carve a separate block for each family of colors and will then use the reduction method of each of the color blocks.
I begin carving with a key block. This block is not always black. It can be any color but will generally be the block with the most or most important detail. I transfer my drawing to this block by flipping it over to reverse the image and then tracing it onto the block using carbon paper. I'll mention here that I use mahogany or cherry plywood blocks and prefer the cherry.
Now I carve this detailed block and then transfer this image to however many blocks I will ultimately use by sliding it into a registration jig that holds the block in place and placing the paper on two pins that will register the paper throughout. I ink the block and print it onto wax or tracing paper, slide out the inked and carved block, and side in a blank block, lay the paper down again carefully and rub the back of the paper to transfer the image. I repeat this process with each of the un-carved color blocks.
Once I've transferred the key block to the color blocks I carve each of these. Now this may get a little confusing because here is where I incorporate the reduction method. Bear with me as I try to make it clear. Let's say I am printing a scene with light blue sky, dark blue water, purple mountains, and a tree in browns and black with a red and orange bird in it. I carved the black of the tree as the key block, so now I have three more blocks to carve:
- - the light and dark blue and the purple will be all on one block.
- - the browns will be on another.
- - the red and orange of the bird on a final one.
For the blues I will carve away all the areas that are not light blue, dark blue or purple and will then print all the remaining areas light blue. I have to print the entire edition at this point because the next step "reduces" the block and going back to print the light blue will not be possible. I carve away the areas that are light blue and print the dark blue on the remaining areas. Finally I carve away the dark blue areas and print the remaining area with purple. Now I move on to the brown block and carve, print, re-carve, re-print for as many shades of brown as I'm using. Then the same for the red, orange block always starting with the lightest shade and printing the darker ones over the lighter. Finally I print the key block in black on top of the other colors and I'm done.
The advantages of using this process are the savings in materials and in time carving. You will not have to re-carve almost identical blocks to add a highlight or subtle shading. The disadvantages are that you must print the entire edition at once and that the blocks are destroyed in the process.
I mentioned jigsaw blocks as well. This technique is quite straight forward. If you have a design that has two or more colors that are completely separated on the block you can carve the separate areas and then use a scroll saw to cut the block into separate pieces. These pieces can then be taken apart, inked separately, put back together and printed all at one time. Another time and material saver.
You know by now that I am an artist in the western tradition who designs, carves, and prints my own work. The time it takes me to produce a print and the methods I employ in part determine the ink I use. I print with oil base ink which doesn't require me to dampen my paper. For paper I prefer the oriental kozo, hosho, and mulberry varieties. They are beautiful and lightweight but strong. I print limited editions of generally 30 or less for color work and I average from 6 to 16 colors per print.
