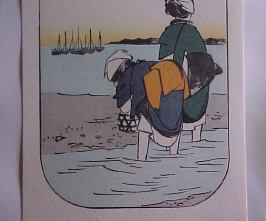
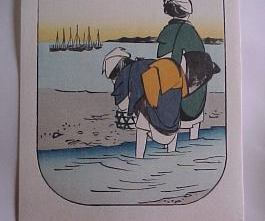
Example of Gradation Printing ('Bokashi') (entry by David Bull)
The gradation being printed in this example uses 'Prussian Blue', the colour most often associated with gradations on traditional Japanese prints - most famously in the landscape prints of Hiroshige and Hokusai.
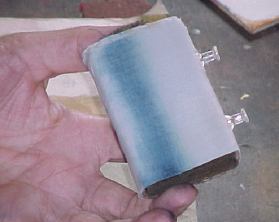
In this case it appears not up at the top edge of the design, but along one edge of a woodblock cut to print a blue sea colour. Here are the 'Before' and 'After' photographs showing the partially completed print (another gradation is also visible in the photos - it was printed in exactly the same way).
Step one: Print the basic background colour for the area in question. This background may be the same colour as the gradation, a related colour (as here), a completely different colour, or in some cases, not present at all.
Note: it is best after printing any area to let the paper recover before printing another colour on top. In the case here, after printing the base colour, I next worked on another area of the print before returning to print the gradation.
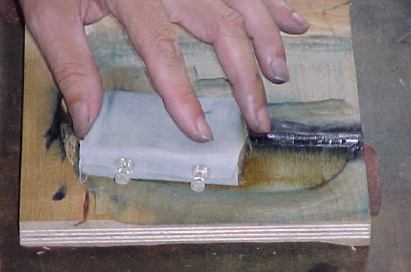
Step two: Using the 'zokin', a pad formed of cloth wrapped around a wooden block, moisten the wood in the area where the gradation is to be printed.
The movement of the pad on the block is side-to-side along the gradation, and as time goes by, it starts to pick up pigment from the block ...
Because of this, it must be applied to the wood in exactly the same place each time, to avoid having pigment appear in unwanted areas. When the cloth starts to become just too soiled with the pigment, it is discarded and a fresh piece pinned in place on the little piece of wood.
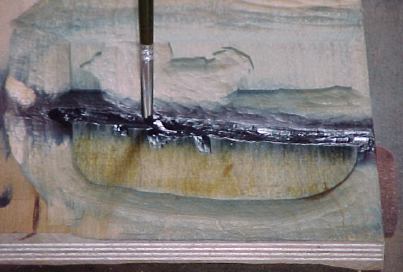
Step three: apply some pigment to the appropriate area. Don't be misled by my use of a small paintbrush here - the pigment is not 'painted' on. I am simply using the brush to transfer a dab of pigment from the bowl over to the block.
Step four: brush out the pigment along the length of the gradation. As one moves the brush side to side, the pigment is blended with the water present on the wood surface, forming a smooth gradation. A small dollop of paste may also be used, if a smoother texture is desired.
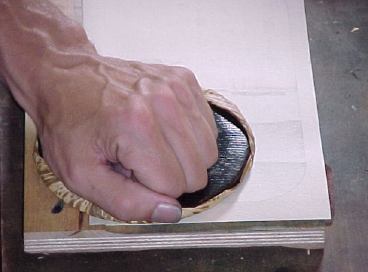
Step five: put the paper in place, and take the impression in the normal way, making sure you cover the entire area in question.
That's it. Although printing any single copy of a gradation is not so difficult, printing 200 of them in sequence - and getting them all exactly alike - is an 'interesting' job ...
(photos by Himi Bull ...)