A 'Scattered Gold' Background (continued)
For this print, I wanted a 'tone' on the paper, so I printed a background tint in the usual manner before any of the other steps. (I also put a light gradation on the background, working up from the bottom of the sheet.) The paper was then ready for the flakes to be applied.
The flakes will be bonded to the paper with nikawa, liquid gelatine - the same substance used to size the paper. It should be mixed with enough warm water to allow it to be brushed over the block, but not so much as to dilute its 'stickiness'. A few trials are in order, to ensure that the flakes on the finished print will adhere properly.
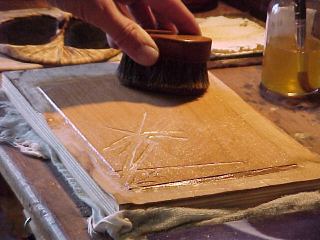
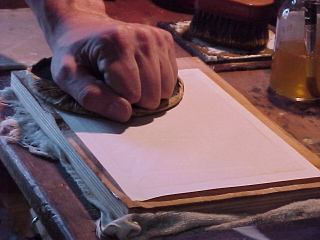
Once the block has been coated smoothly, lay the paper in place and lightly use the baren to ensure that contact has been made everywhere. Do not use as much pressure as you do in normal printing - you want the gelatine to remain on the surface of the sheet, not to be pressed down into the fibres.
Because I want the flakes only to appear in the 'background' portions of the image, I prepared a cardboard mask for the next step:
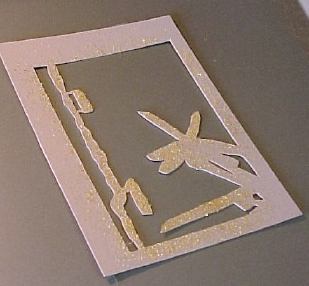
The wet paper is placed face up on a hard and smooth surface (a sheet of heavy glass is perfect), and the mask aligned properly on top of it:
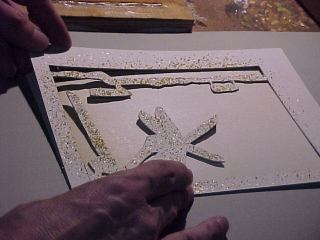
Now the fun begins. Take the takezutsu and lightly wave it in the air above the print. Too lightly and no flakes will come out - too vigorously and too many will drop down. How high up? Too high and the flakes will fly all over the room instead of where you want them - too low near the paper and you will get 'clumps' instead of a smooth distribution. About 10~15 cm up above the paper seemed to be about right for this print ...

You will have to occasionally tap the takezutsu with a fingernail of the opposite hand, to dislodge more flakes. Keep the waving motion going though, or you will get an uneven distribution of flakes on the surface of the sheet.
When you've got the coverage you want, lay the takezutsu back down gently, lift off the mask, and cover the paper with a sheet of something smooth for the next step. Rub with the heel of your palm firmly over the entire surface, to flatten the flakes in place and ensure that they are bedded into the wet surface.

The result should be something like this:

The flakes could actually be scraped off at this point, but if they are not disturbed they will remain in place, and when the paper is dried at the end of the printing process, they will become permanently fixed.
The still-moist paper now goes into the stack, ready to be printed with the next colour in sequence ...