Printing with Metal Powders (entry by David Bull)
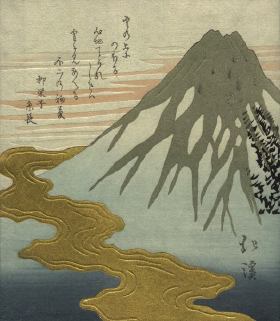
The 'surimono' prints that enjoyed a heyday in Japan in the late 1700's and early 1800's were noted for their use of 'special' printing effects. A printing technique commonly seen on fine surimono is the use of powdered metals: gold, silver, copper, bronze ...
Printing effectively with metals is a difficult job; they do not lend themselves to the same techniques used for the other pigments on a print, which are usually dissolved in a liquid medium (water or glue) in order to be applied to the paper.
Here is an outline of a basic technique for printing powdered metal. The example used is the application of a fine bronze powder on a reproduction of a print by Totoya Hokkei.
The powder will be attached to the print with 'nikawa' (gelatine). The first step is to prepare a solution of gelatine in water. It is difficult to describe the 'recipe' for this, because the strength of the glue will be determined by such things as the fineness of the metal powder in question, and the heaviness of the paper, etc. I am using an extremely fine powder in this example, so mixed the glue rather thinly.
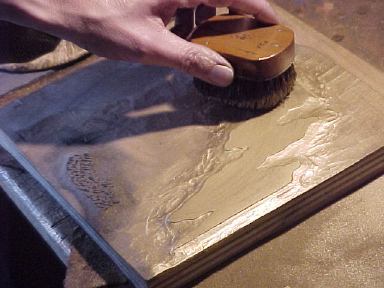
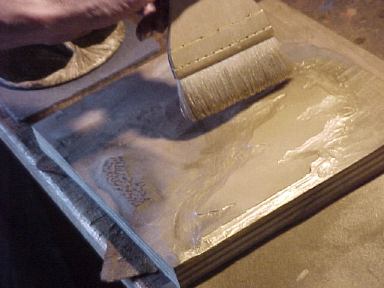
A dab of the glue goes on the block. It should be mentioned that before the metal printing you are watching here started, the same block was used to print an 'undertone'. The most common colours for these undertones are grey to go under 'silver' type metals, and yellow to go under 'gold' type metals. Doing this ensures a deep rich effect in the finished print. The original print I am reproducing here uses a deep green tone under the bronze, and I printed that with the same block you see here being used for the metal itself. (By the way, the block in this photo looks to be covered in the metal powder, but that is because this photo was taken after many impressions had been taken. The 'dabber' in the photo is applying nothing but the gelatine mix ...)

Use a normal printing brush to spread the glue mixture out evenly over the surface of the block.
Lay the paper in place ...
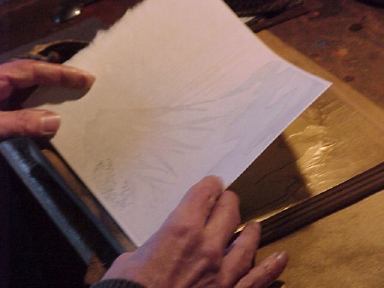
And with light pressure, print the glue onto the surface of the paper. (Do not drive the glue down deep into the paper - the idea is to get a layer of glue right on the paper surface.)
Lay the sheet aside. Now moving quickly, before the glue has a chance to set, put a dab of bronze powder onto the block.
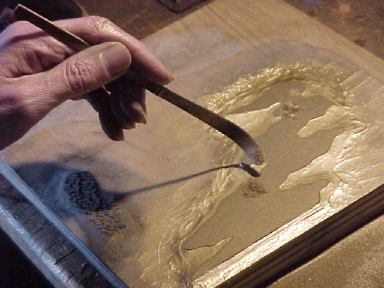
Use a very light brush, and gently spread it over the surface of the wood. A bird feather is sometimes used for this step. Getting it right is difficult - brush too firmly and not enough powder will remain - brush too lightly and the powder will not lie in a smooth layer. Ensure that the entire surface of the carved area is covered. A sheet of plain paper is tucked under the edge of the block to catch excess powder being brushed off ...
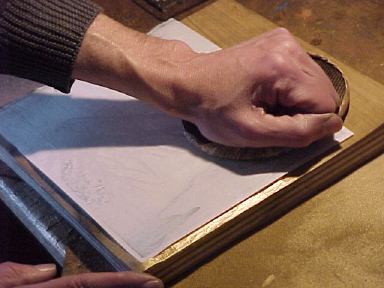
Put the paper back on the block ...
And again, rub the back to make the impression. Just how firmly to rub will depend on a number of factors; a bit of experience will show you ...
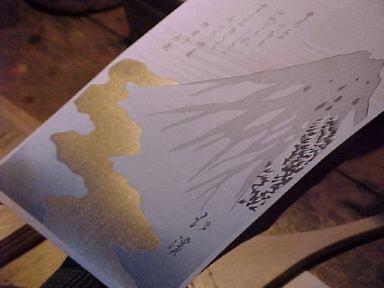
Peel off the paper, and you're done! Now, quickly get to work on the next copy before the left-over stuff on the block gets too gummy ...
(A few more notes are on a second page ...)